A shock absorber controls how quickly your float’s suspension moves, so the float settles after every bump instead of bouncing, and your horse spends less effort staying upright. Good ones are quiet, dry apart from a light oily film, firmly bolted and slightly warm after a drive. Worn ones leak in streams, rattle or go cool. You can check all of that yourself in about ten minutes, and this guide shows you how. If you are weighing up a new float, the suspension, floor and safety build matter as much as any single part, and our float range is built around those things.
What a shock absorber actually does on a float
Springs absorb a bump, but a spring left alone keeps bouncing. The shock absorber (also called a damper) is the part that stops that bounce. Hendrickson’s Australia and Asia-Pacific inspection guide explains that a shock dampens suspension movement by turning kinetic energy into heat, which the oil then dissipates. It works at temperatures from ambient up to 175°C, and after normal use it should feel at least slightly warm to the touch.
That heat is a useful clue. A shock that does its job gets warm. One that stays cold while its partner on the other side is warm is probably not working.
On a horse float the job matters more than on a box trailer. Your cargo is alive, moves around and constantly adjusts its balance. Every pothole, corrugation, sudden brake or roundabout asks the horse to compensate with its legs and core. A float that rides smoothly and settles quickly asks less of the horse, and a horse that has worked less on the road generally arrives in better shape for the ring, the trail or the paddock.
Not every float uses a conventional shock absorber. Some designs rely on the suspension itself to do most of the damping, which is why the first step is to know what is under your float.
Know your suspension before you shop for parts
Horse floats in Australia commonly use one of two suspension families: leaf springs, which are stacked steel strips, or torsion (rubber) suspension, where a steel bar sits inside rubber cords in the axle tube. Each one handles damping differently, and a shock absorber that suits one setup may be pointless or wrong on another.
If you are still deciding between them, our guide to torsion versus leaf spring suspension for horse floats covers the trade-offs in plain terms.
To find out what you have:
- Look under the float behind the wheel. Stacked curved steel strips mean leaf springs. A short swing arm coming off the axle tube with no stack of strips points to a torsion or rubber design.
- Look for a cylinder. A shock absorber is a slim, tube-shaped part with a rod, mounted between the axle (or spring hanger) and the chassis, usually at a slight angle.
- Read the compliance plate and manual. The axle and suspension make and model are usually listed, and the manufacturer’s part number is what you need for a replacement.
- Count them. Shocks usually work in pairs, one per side. If one has been replaced and the other has not, you will get uneven damping.
Write down the make, model and part number before you buy anything. Mounting lengths and ratings differ, and a part that almost fits is not a part that fits.
Tyres, suspension and shocks work as one system
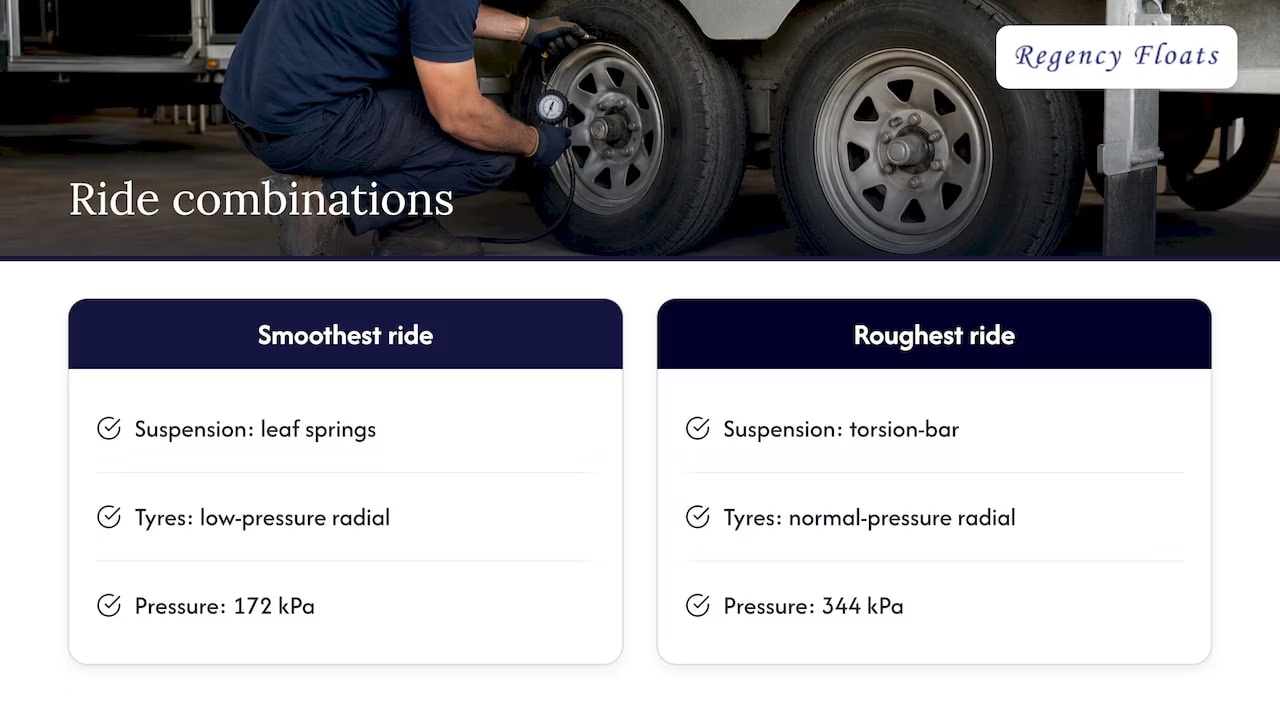
Ride comfort is never down to one component. A peer-reviewed study published by the American Society of Agricultural and Biological Engineers tested twelve combinations of suspension type, tyre type and shock absorbers on a two-horse tandem-axle trailer. Its results found the smoothest ride came from leaf springs paired with low-pressure radial tyres at 172 kPa. The same study found the roughest combination was torsion-bar suspension with normal-pressure radial tyres at 344 kPa, and that horses on the right side of the trailer felt more vibration than those on the left, possibly because of poorer road surfaces near the shoulder.
The lesson for owners is practical: tyre pressure is part of your suspension. Before you blame a shock absorber for a harsh ride, check the tyres against the pressure recommended for your float and load. Our horse float tyre pressure guide walks through how to check and maintain pressure properly and why correct pressure is critical for safety.
The study also tells you something about where horses stand. If you travel a single horse, think about which side it rides on and how rough the roads you use most are. It is a small point, but it shows how much road surface matters.
Signs your shock absorbers are worn or failing
Shock absorbers wear gradually, so you tend to adapt to a worse ride without noticing. Check for these signs, drawn from Hendrickson’s guide:
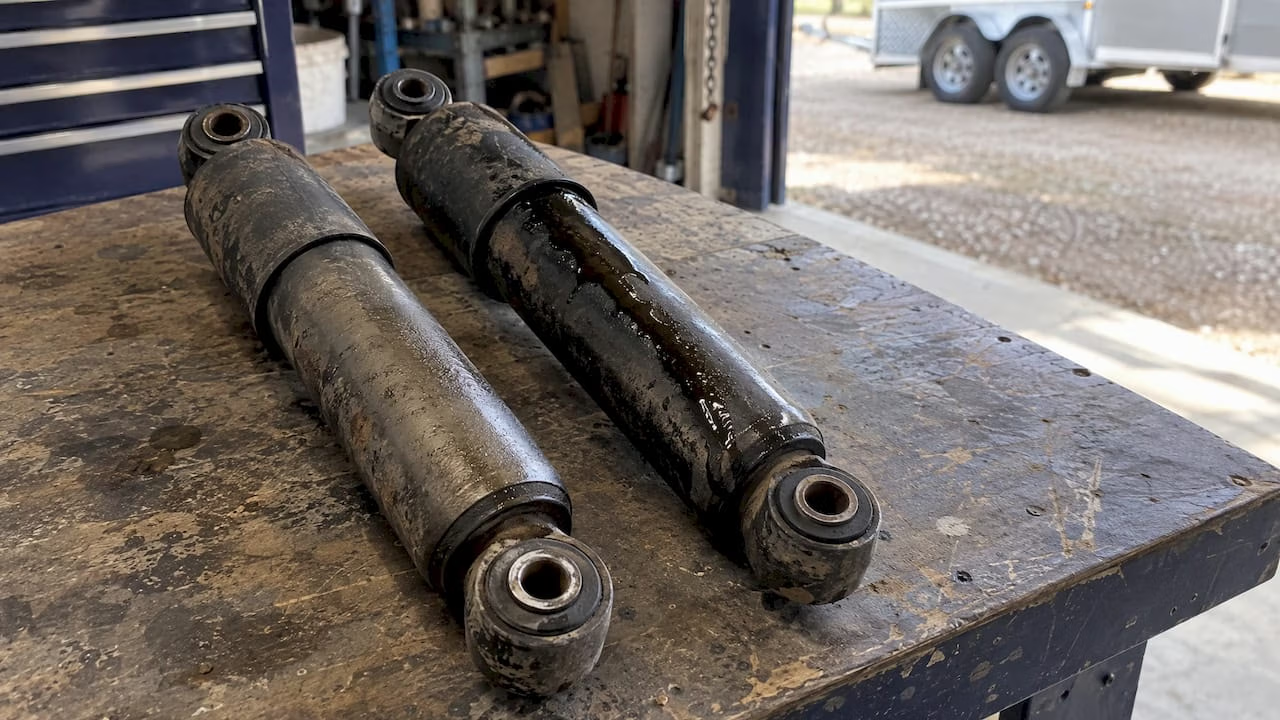
- Fluid streaming from the upper seal. Oil running down the body, or dripping from it, means the shock has failed and needs replacing.
- A shock noticeably cooler than its partner. After a drive of about 15 minutes, both shocks on an axle should feel similar. A cold one is not working.
- Rattling when shaken. Loose metal parts inside mean internal damage.
- No resistance when stroked. A healthy shock resists when you compress and extend it by hand. One that moves freely has lost its damping.
- Physical damage. Look for loose mounting bolts, broken mounts, worn bushes (the rubber or polyurethane sleeves at each end), damaged dust shields and a badly dented shock body.
Misting is not leaking
A light, thin oily film on the shock body is called misting. The guide describes it as a normal, necessary function: hot oil evaporates at the rod seal and lubricates it. Do not replace a shock for misting alone. The difference you are looking for is a film versus streams. If oil is running or dripping, replace the shock.
What you may notice from the driver’s seat
The road itself will tell you things the inspection does not. Watch for:
- the float continuing to bounce after a dip or crossing a rail line
- more sway or pitching on the highway than you remember
- clunks or knocks over rough surfaces
- uneven tyre wear, which can point to a suspension component not controlling wheel movement
- horses arriving sweaty, stiff or unsettled after trips that used to be easy
None of these proves a shock is faulty, but each is a good reason to put the float on the inspection routine below before your next long trip.
A ten-minute inspection routine
Do this with the float parked on level ground, hitched or on stands, and ideally after a drive so you can feel temperatures. Always chock the wheels and keep clear of moving parts.
- Clean first. Trailer Magazine notes that heavy dust and debris can act as an abrasive and may cause wear. Hose or brush the shock bodies and mounts so you can see them properly.
- Check for leaks versus misting. Look at the upper seal and the length of the body on each shock. A film is fine. Streams or drips mean replacement. SAF-HOLLAND’s Australian service manual draws the same line.
- Check the bolts. Upper and lower shock bolts should sit at the torque the manufacturer specifies, and the service manual says so directly. Loose bolts are more than a safety concern: Trailer Magazine’s Luke Applebee points out that they can damage the mounting holes themselves, which then loosens the fit of any new shock you install.
- Check the mounts and bushes. Look for cracks, elongated holes, broken brackets and perished or split bushes.
- Feel the temperature. After a 15-minute drive, compare left and right. Both should be at least slightly warm.
- Compress and extend by hand where practical. You are feeling for resistance. A shock that moves with no effort is spent.
- Look at the dust shield and body. Dents and crushed shields are reasons for replacement.
- Look at everything around it. Check tyres, wheel bearings, the springs or torsion arms, and the hitch. Shocks cannot compensate for a worn spring or a tyre at the wrong pressure.
If the shocks fail any step, replace both on that axle together rather than one, so damping stays even. Use the part number from your float’s documentation and the torque setting the manufacturer gives. If you do not have the tools or confidence to torque and fit suspension parts, have a qualified trailer mechanic do the work, because brakes and suspension are safety-critical.
How often to check
There is no single interval that fits every float, because use varies so much. A float that goes to a few local rallies on sealed roads lives a different life from one that covers thousands of kilometres of corrugated roads each season. A sensible pattern is:
- Before every long trip: a quick walk-around for leaks, loose bolts and tyre pressure.
- At each service: a full inspection, as above.
- After rough roads, a hard hit or a long haul: check the mounts, bushes and bolts again, since that is when they loosen.
Follow your float and axle manufacturer’s service schedule where it gives one. Keep a short log of dates, findings and parts replaced. It makes the next inspection faster, and it is useful if you later sell the float.
Do not forget the tow vehicle
The float’s suspension is half of the story. With a horse on board, the downward load on the towball can push the rear of the tow vehicle down, and that changes how it steers and brakes. VB-Airsuspension’s Australian horse-truck page notes that this load reduces steering response, stability and control, and that rear-axle helper air bags can support the rear suspension and keep the vehicle level.
If your ute or four-wheel drive sags at the back when hitched, have its own springs and shocks assessed as well. A well-damped float behind a tired tow vehicle will still feel unstable. Checking the tow vehicle’s rated towball download and your float’s loaded ball weight is also part of a safe setup. A longer drawbar changes the geometry again, and our guide to extended drawbar horse floats explains what that means for hitching and handling.
When a new float makes more sense than another repair
Shock absorbers are a consumable part, and replacing them is routine. But if you are replacing shocks, bushes, springs, tyres and floor boards on an older float all in the same year, it is worth asking whether you are chasing wear across the whole machine. Add up the parts and labour, and compare that with what you would get from a new or pre-owned float with a modern build.
Things worth comparing when you shop:
- the suspension type and how it suits the kind of roads you drive
- the flooring system and what warranty backs it
- the safety features and how the float handles in a panic stop
- whether the layout (straight load, gooseneck, camper, two horse) suits your horses and your tow vehicle
- how easy it is to get parts for the float later
Our guide to choosing the right float goes through those questions, and the Australian horse float manufacturers buyer’s guide helps you understand who builds what.
Safer travel starts with how the float is built
Regency Floats has built horse floats in Australia for over 40 years, with the focus on safety, comfort and durability for the horse. Our floats combine advanced safety technology, European luxury design and a state-of-the-art flooring system backed by a ten-year warranty. We also sell float accessories and parts, and new and pre-owned floats, and you can customise colours and fittings to suit you.
Whether you haul one horse to pony club or a team to competition, browse the Standard, Deluxe, Camper, Gooseneck, Straight Load and Thoroughbred ranges, or start with the 2 horse float range.

We deliver Australia wide, and you can also see floats at our display locations, including Perth, Brisbane and Tasmania.
Looking after tyres, bearings and the rest
Shock absorbers get attention because they are easy to see leaking, but good float maintenance is a set of habits. Our general float tyre maintenance notes cover what goes beyond pressure: age, sidewall cracking and tread. Combined with the shock inspection, that gives you most of what matters in ride quality and road safety.
A simple pre-trip list you can keep in the tow vehicle:
- tyre pressure, cold, and spare checked
- shock absorbers: no streaming oil, bolts tight, mounts intact
- brakes and breakaway system working
- lights and wiring
- hitch, safety chains and coupling secure
- floor, partitions and ramps sound
A few minutes on this list before loading is far cheaper than a roadside breakdown with a horse on board.
Frequently asked questions
Do all horse floats have shock absorbers?
No. It depends on the suspension design and how the float was built. Some floats use shock absorbers with leaf springs, others rely on a torsion or rubber suspension that does much of the damping itself. Check your compliance plate and manual, or look under the float, to see what yours has.
How do I know if a shock absorber has failed or is just misting?
Misting is a thin oily film on the body and is normal, because it lubricates the rod seal. Oil running in streams from the upper seal or dripping from the body means the shock has failed and needs replacing. A shock that is cold after a 15-minute drive when its partner is warm is another warning.
Should I replace shock absorbers in pairs?
Yes, as a rule replace both on the same axle together so the damping stays even from side to side. Use the manufacturer’s part number and torque setting for the bolts, and have a qualified trailer mechanic do it if you are not set up to work safely on suspension.
Can tyre pressure affect how smooth my float rides?
Yes. In a published two-horse trailer study, the smoothest combination used low-pressure radial tyres, and the roughest used normal-pressure tyres with torsion-bar suspension. Always set pressure to the recommendation for your float, tyre and load, rather than guessing.