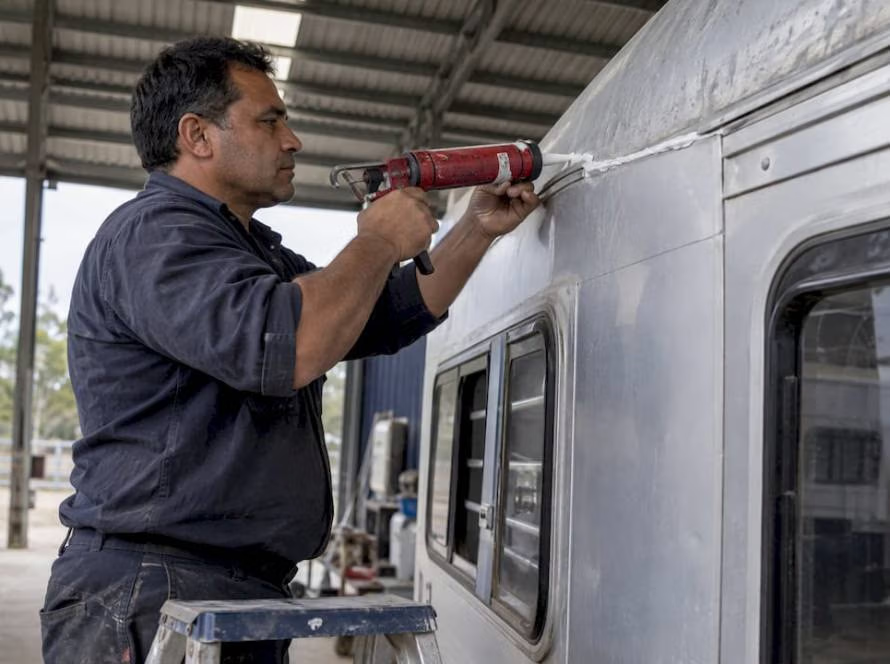
A stone guard is a protective panel fitted across the front of a horse float, usually the nose and lower front wall, to take the hits from stones, gravel and road grime thrown up by your tow vehicle and passing traffic. If you tow on sealed highways, country dirt roads or both, it is one of the cheapest ways to keep the front of a float looking and performing as it should. The best time to settle it is when you order or choose your float, because a guard shaped to the float’s front is a cleaner, tighter job than one added later. Regency Floats builds floats with customisable fittings and colours, so the front-end finish is part of the conversation from the start.
This guide explains what a stone guard does, the main styles you will see on Australian floats, how to check one fits, how to look after it, and how it fits with the rest of your pre-tow routine.
What a stone guard actually does
Every vehicle on the road flicks up stones. Your tow vehicle’s tyres do it, trucks ahead of you do it, and on a freshly sealed road or a gravel shoulder the problem gets worse. The tow vehicle’s rear wheels throw most of it backwards, straight at the front of your float. Left unprotected, that front wall takes a constant spray of small impacts.
The damage shows up in a few ways:
- Chips and pitting in the paint or panel finish. Once the coating is breached on a metal panel, moisture can get in and corrosion can follow.
- Cracked or scratched front windows or lights, where the float has them on the nose.
- Tar and bitumen splatter. Fresh road surfacing leaves sticky black spots that are slow to remove and can mark the finish.
- Damage to anything mounted at the front, such as the coupling area, cables, gas bottles on a camper-style float and the A-frame.
The traditional answer, described by Outback Travel Australia, is a wide vertical mudflap behind the tow vehicle’s rear wheels combined with a downward-angled mesh deflector or a sacrificial panel on the front of the trailer. The idea is simple: something cheap and replaceable takes the impact so the float’s body does not.
For a horse float, that matters more than it does for a plain box trailer. A float is a significant purchase, it carries animals whose comfort depends on the shell, seals and flooring staying sound, and it is often resold. A clean front end is one of the first things a buyer looks at.
The main types of stone guard
If you browse floats for sale in Australia, you will see the same few approaches again and again. Which one suits you depends on how you tow, what the float looks like and how much you care about appearance.
Checkerplate or aluminium guard
A sheet of checkerplate (the raised diamond-pattern metal) is shaped around the lower front of the float. It is tough, it looks smart and it resists the sort of repeated impacts that would pit paint. Because it is rigid, it is usually shaped and mounted to follow the float’s profile, which is why it is best planned at the build stage. It is also the style that sits most naturally with a European-look finish, where the guard becomes part of the design rather than an add-on.
Powder-coated or painted steel finish
Some guards are a coated metal panel in a colour matched or contrasted to the float. The appeal is looks: it can be finished to suit the body. The coating needs the same attention as any painted surface, so touch up chips early.
Rubber (conveyor belt) guards
Heavy rubber sheeting, often cut from conveyor belt with a reinforced core, hangs from the front of the float or the tow bar area. Stones hit it, drop off and do little damage. Specialty suppliers sell these in sizes such as 2000 mm wide with a 400 mm drop, which gives you an idea of the coverage involved. Rubber is forgiving and cheap to replace, but it moves in wind and can look rougher than a shaped panel.
Mesh or deflector guards
A reinforced mesh stretched in a trapeze shape from the A-frame breaks up stones and lets air through. Because the shield sits roughly horizontally and angled down, it does not act like a sail and does not trap heat under the float. It is common on camper-style and off-road setups where the A-frame, gas bottles and cables need protection as well as the front wall.
Quick comparison
| Style | Strengths | Best for | Fitting |
|---|---|---|---|
| Shaped checkerplate | Very durable, clean look, part of the design | Floats you tow often on highways and want to keep resale-ready | Best specified at build |
| Coated steel panel | Colour-matched finish | Owners who want the guard to blend in | Best specified at build |
| Rubber sheet | Absorbs impact, easy to replace | Gravel and dirt-road use | Bolt-on, can be added later |
| Mesh deflector | Protects A-frame, cables, gas bottles | Camper and gooseneck-style setups | Measured to fit |
Is a stone guard standard or an optional extra?
On Australian floats it is most often listed as an option, not a given. Dealer spec sheets commonly show stone guard protection as a choice, sometimes split into styles such as a checkerplate guard or a stoneguard finish, alongside other extras like head dividers, windows and storm doors. That means two floats with similar headline prices can differ at the front end, so compare like with like.
When you look at any float, ask directly what is fitted to the nose and what is optional. If you plan to tow on country roads, include it in your budget at the time of purchase rather than treating it as an afterthought.
Regency Floats does not publish prices for its ranges, so the way to find out what suits your float and budget is to look at the range you are interested in and discuss the options. The Regency range page lists the Standard, Deluxe, Camper, Gooseneck, Straight Load and Thoroughbred Series floats.
Which owner needs one most
Not everyone tows in the same conditions. A rough guide:
- Weekend riders on local sealed roads. Lower exposure, but tar and the odd stone still happen, and a guard keeps the float looking new for resale.
- Families towing long distances for holidays or pony club events. Highway speeds mean stones hit harder. A guard is a sensible inclusion.
- Competition riders on a regular circuit. High kilometres across many states and road types. You want the front end to stay presentable and the structure protected.
- Professionals and agistment or breeding businesses. The float is a working asset. Protecting it protects its value and its uptime.
- Anyone with a camper-style or gooseneck float. More hardware at the front means more to protect, including gas bottles, cables and the coupling area.
If you are towing on dirt for any real distance, a guard stops being cosmetic.
How to check a guard fits your float
A guard only works if it covers what is actually being hit. A few checks save disappointment:
- Measure the front of the float. Note the width at the widest point, the height you want covered, and any curves, lights or fittings that the guard has to work around.
- Look at the tow vehicle. Your wheel track, mudflaps and rear bumper height decide where stones are thrown. A guard that sits well behind a high 4WD may look different on a low wagon.
- Check clearance on turns. The guard must not catch the tow vehicle or the A-frame when you reverse into a tight spot or jack-knife at an angle.
- Confirm it does not block lights, vents or access. Front-mounted lights and any storage hatches need to stay usable.
- Decide on shaped or flat. A shaped panel follows the nose and looks neat. A flat or hanging guard is simpler and cheaper but looks different.
Mesh deflectors are typically made to measure to the individual trailer, which is one reason to take your measurements and photos with you when you ask about them. A guard that is shaped to the float at the time it is built avoids guesswork, and that is where choosing it with a new float is simplest.
Where the guard sits in the bigger protection picture
A stone guard handles the front. The rest of your float needs its own attention, and several parts interact.
Lights and rear
Stones and reversing knocks hit the rear too. If you want to understand how to protect lights and stay compliant, our guide to tail light guards for horse floats covers choosing, fitting and keeping lights legal.
Dust and airflow
Dirt roads throw dust as well as stones. Dust getting into the horse area is a separate issue from stones hitting the front, and our page on dust control for horse floats explains what owners need to know.
Weather
Storm doors and seals protect against wind-driven rain and the elements. See storm doors on horse floats for what they do and how to choose.
Seals and seams
Stone chips near seams, windows or joints can let water in over time. If you find damage near a joint, see how to reseal a horse float for windows, joints and seams.
Caring for a stone guard
A guard only keeps doing its job if it is kept in good order. It takes impacts by design, so expect wear and check it regularly.
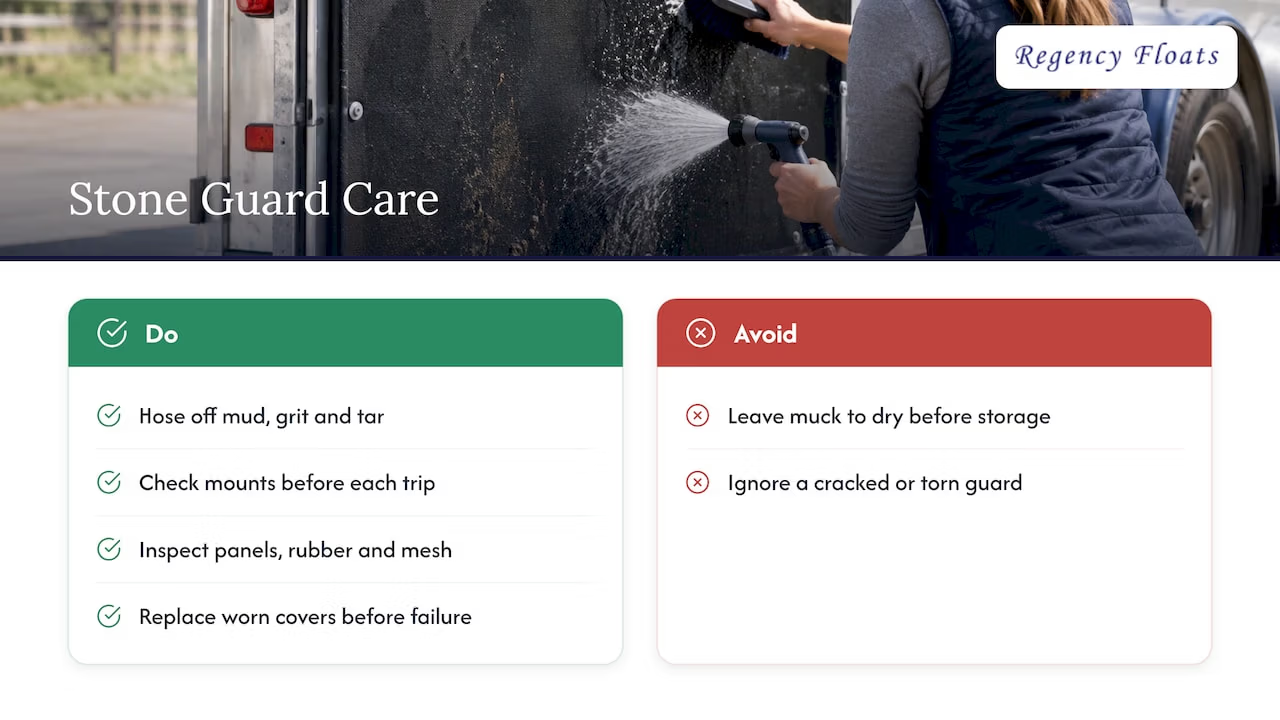
After every dirt-road trip, hose off mud, grit and any tar. Grit trapped behind a guard can sit against the paint and rub, and tar is easier to remove fresh. Do this before storing the float, because muck left to dry sets hard.
Before each trip, look over the mounting points. Corrugated roads and long distances can loosen bolts and brackets, so check that mounting hardware is tight and that nothing has shifted or cracked. A loose guard can rattle, rub the paint or, worse, come away on the road.
Inspect the surface. On checkerplate or coated panels, touch up chips so bare metal is not exposed. On rubber, look for tears and thin spots. On mesh, look for fraying or holes and replace a worn cover before it fails.
Replace, do not ignore. The whole point of a guard is that it wears so the float does not. A guard that is cracked or torn is no longer protecting anything.
Washing without damaging the finish
Washing grit off a guard and the nose with a dry cloth or a rough scrub drags stones across the paint. A gentler routine pays off: rinse first, then wash with clean water and a mitt. The two-bucket wash method is built around keeping dirt out of your wash water, which is exactly what you want when the front of the float is covered in road grit.
Add it to your pre-trip routine
The guard check takes about a minute when it is part of a routine. Our horse float pre-trip checklist covers the before-you-tow routine, and the horse float parts guide explains what to check and repair across the float.
Choosing a float with the front end in mind
If you are shopping for a float, treat the front end as part of the specification, not a footnote. Here is a sensible order to work through:
- Decide how you will tow. Mostly sealed roads, regular gravel, or long outback runs? That sets the level of protection.
- Pick the float type. Standard, Deluxe, Camper, Gooseneck, Straight Load or Thoroughbred Series each have a different front-end layout and different hardware to protect.
- Choose the guard style. Shaped metal for a clean, durable finish, or a deflector or rubber setup if the A-frame and cables need cover.
- Match colours and finish. A colour-matched guard looks like part of the float. Regency floats are customisable in colours and fittings, so the look can be planned with the rest of the build.
- Check storage and security. A float kept under cover and secured holds its condition and value. See our notes on horse float storage ideas and horse float security.
- Plan the accessories together. Guards, lights, covers and the like are easiest to specify together. The horse float accessories list is a useful way to build that list before you buy.
For a wider look at what to weigh up when buying, see how to choose the perfect float for you and your horse.
Worked example: two owners, two setups
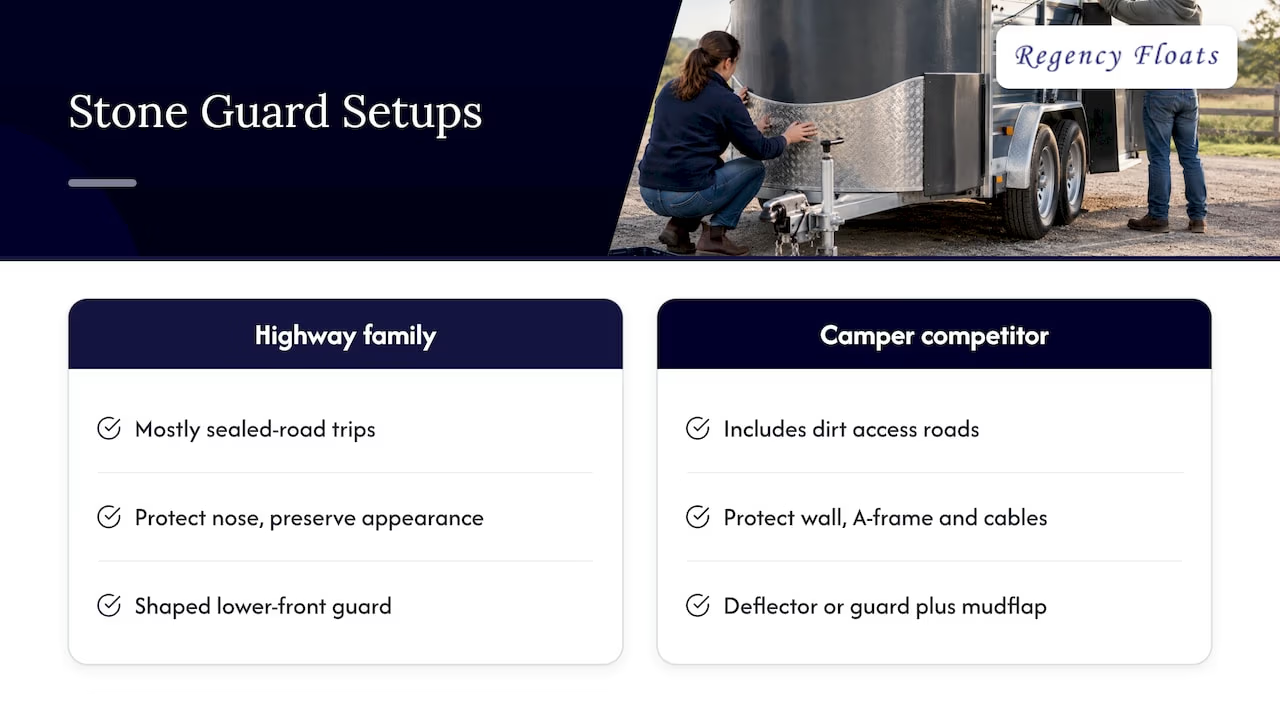
A family with a 2 horse float, mostly highway. They tow two to three hours to events a few times a month, mostly on sealed roads. Their main concerns are stone chips on the nose at highway speed and keeping the float looking good. A shaped guard on the lower front, specified when the float is built, fits their needs, and a rinse after each trip keeps it clean.
A competition rider with a camper-style float. They cover long distances across regions, including dirt access roads to grounds. The front carries more hardware, and the owner wants to protect the A-frame and cables as well as the wall. A deflector-style guard or a combination of a front guard and a mudflap behind the tow vehicle gives wider cover, and a quick bolt check before each trip becomes routine.
In both cases the decision is made once and pays back for the life of the float.
A float built for the long haul
A stone guard protects the outside. What the horse stands on matters just as much. Regency Floats has been building horse floats for over 40 years, with advanced safety technology, European luxury design and a flooring system backed by a ten-year warranty. You can choose colours and fittings to suit the way you ride and tow, from casual weekends to the competition circuit.

Browse the Regency Floats range to compare the Standard, Deluxe, Camper, Gooseneck, Straight Load and Thoroughbred Series floats, or start with the 2 horse float range if a two-horse setup is what you need.
Frequently asked questions
Do I need a stone guard on a horse float?
If you tow regularly on highways, country roads or dirt, it is a sensible inclusion. It protects the front wall and anything mounted there from stones and tar, which keeps the float sound and presentable. Owners who tow only short distances on sealed roads face less exposure but still benefit when it comes time to sell.
Is a stone guard standard on a new horse float?
It is usually listed as an optional extra on Australian floats, sometimes in more than one style. Ask what is fitted to the front of the float you are looking at and what can be added, so you compare floats on the same terms. Specifying it at purchase lets it be shaped neatly to the float.
What is the difference between a stone guard and a mudflap?
A mudflap hangs behind the tow vehicle’s rear wheels and stops stones being thrown in the first place. A stone guard sits on the front of the float and takes the hits that get through. Used together, they give the best protection, as Outback Travel Australia describes in its coverage of the traditional approach.
How often should I check my stone guard?
Give it a look before every trip, including a check that mounting bolts and brackets are tight. Hose off grit and mud after dirt-road travel, and replace a guard or cover that is torn, cracked or worn through. Making it part of your pre-tow checklist keeps it a one-minute job.
Can a stone guard be added to a float later?
Bolt-on rubber and mesh guards can usually be added after purchase, provided they are measured to the float and do not block lights or clearance. Shaped metal guards look best when planned with the build. Either way, take measurements and photos of the front of the float before you order.