
To reseal a horse float, find where water is getting in, strip out every bit of failed sealant, clean and dry the surface, then lay a fresh bead of a flexible, UV-stable sealant that suits the materials. Do it dry, in mild weather, and let it cure fully before the float goes out in the rain. Most owners can handle window rubbers, trim strips and exposed seams. Structural joints, roof seams over damaged framing and anything under warranty are better left to the manufacturer or a qualified repairer.
This guide walks through the whole job in order: how to tell a seal has failed, what to use, how to prepare, how to apply it, and where the DIY line sits.
Signs your float needs resealing
A float seals against water in dozens of small places: window rubbers, door and ramp edges, roof and wall joins, light housings, vents, and the edges of the floor and rubber matting. Any of them can open up with age, UV and the constant flexing of a vehicle on the road.
One Australian maintenance guide recommends checking sealed floor edges monthly for wear, damage or gaps, and checking windows for leaks caused by movement or normal wear. Water that gets into a floor edge can cause damage you will not see until the timber or panel is already compromised, so small gaps are worth fixing the day you find them.
Walk around the float in good light and look for:
- Cracked, shrunken or peeling sealant along seams, trim strips and around fittings.
- Gaps where a bead has pulled away from the panel on one side.
- Brittle window rubbers. Press one with a fingernail. A seal that feels hard, has hairline cracks or no longer springs back is finished. A caravan-maintenance guide suggests looking for visible cracks or gaps around window perimeters and checking whether rubber has gone brittle.
- Water stains, bubbling paint or white or brown streaks below a seam or window.
- Damp or a musty smell inside after rain or a wash, particularly in corners and around the front of the float.
- Daylight visible through a joint from inside.
Test, don’t guess
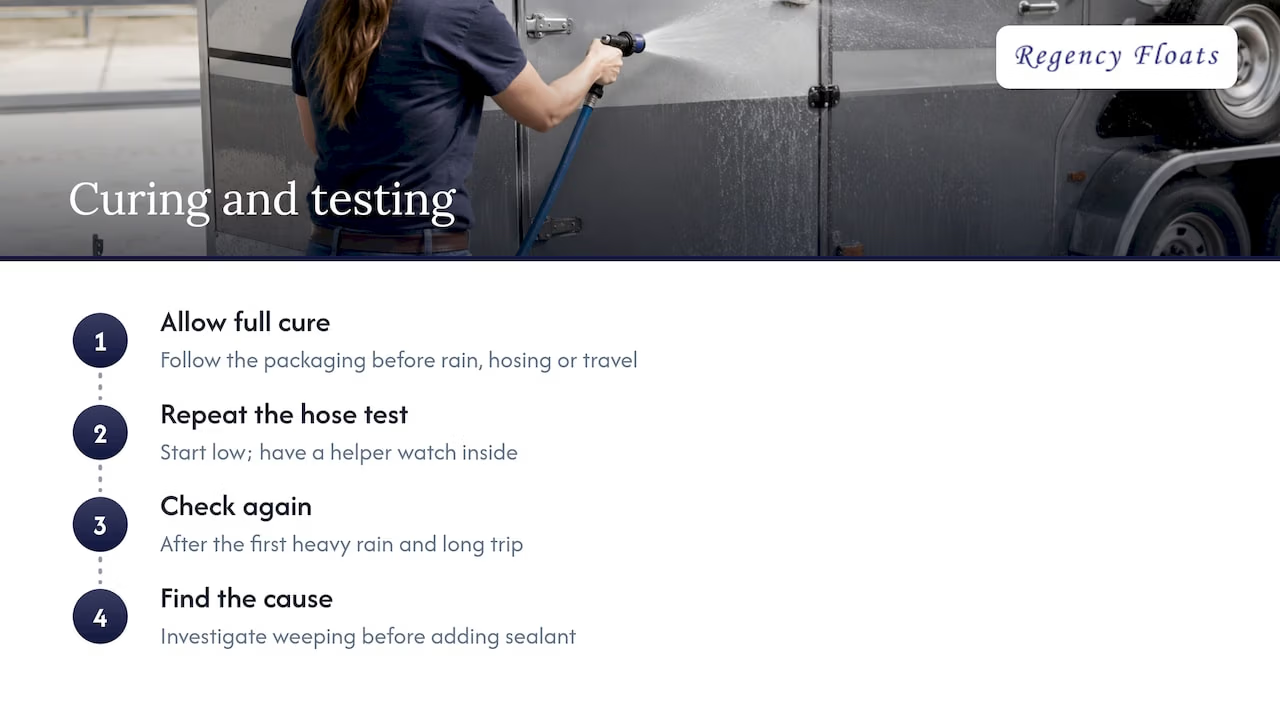
The same caravan guide recommends testing for water entry rather than only looking. With a helper inside, run a hose gently over one section at a time, starting low and working upward, and watch for drips. Moving upward matters: if you soak the roof first, you will not know which joint let the water in.
Keep in mind that a leak rarely shows up where it starts. One caravan sealant guide warns that water often travels along internal framing and wiring, so the source can be well away from the spot where it finally appears. If a stain sits under a window, the window may be fine and the culprit may be a roof seam above it. For a deeper look at roof problems specifically, see our guide to horse float roof leaks. A general method for tracing a fault back to its origin, rather than treating the symptom, is also covered in this guide to tracing a fault to its source.
Clean the float first
A clean float shows you far more. Allow the water to drain out while you hose, sweep out bedding, and remove urine and manure. One Australian maintenance guide says that cleaning this way helps reveal areas needing attention and that leaks around windows and access points should be fixed promptly to prevent paintwork or structural damage. Urine and manure should come out after every trip, because they sit against seams and mats and speed up deterioration.
For the outside, a proper wash routine for a van or float, like this one on cleaning a caravan exterior, gets road film and grime off so you can see hairline cracks and lifting edges. Let everything dry fully before you inspect closely and before any sealant goes on.
Check for other damage before you seal
Sealant is not a repair for rot, rust or a weakened panel. If the cause of the leak is structural, a new bead only hides it. The same caravan guide warns that smearing sealant over an outside edge may briefly slow a leak but can trap water or conceal the real failure.
Before you reseal, lift the rubber matting and look at the floor, especially where the horse stands. You are checking for:
- Discolouration, soft spots, bulging, sagging or cracks.
- Rust at joints, around the wheel arches and along the chassis.
- Damage around the ramp, latches and hinges.
- Corroded or cracked fittings that sealant would only paper over.
If you find any of that, repair it first. Our horse float parts guide lists what to check and when a part should be replaced rather than patched. For the larger question of whether the float is fit for the road, see what makes a horse float roadworthy in Australia.
The stakes go beyond tidy paintwork. A council road-safety release notes that incorrect loading and non-compliance can void insurance cover, which is one more reason to keep a float in sound, documented condition.
Choosing the right sealant
Not every tube from the hardware shop suits a float. Your sealant has to cope with vibration, body flex, heat, cold and strong Australian sun. It also has to stick to whatever the float is made from, whether painted steel, aluminium, fibreglass or a composite panel. Always read the product’s technical data sheet for the materials it is approved for.
UV stability matters here
Australia’s solar radiation is harsh on exposed joints. A local caravan guide says that exterior joints need a UV-stabilised sealant to avoid early cracking, shrinking and failure. The same guide says plain silicone can deteriorate under UV and suggests silicone-free options such as polyurethane or butyl for this kind of work. Silicone also leaves residue that makes later repairs and repainting difficult, so many repairers avoid it on vehicle bodies.
Common options
| Type | Where it suits | Things to know |
|---|---|---|
| Polyurethane adhesive sealant (such as Sikaflex 221 or 512) | Seams, trim and edges where you want bonding and sealing in one step | Cures to a durable elastomer. Sikaflex 221 is sold for edges and joins between rubber mats, or a mat and a float wall. The Sikaflex 512 Caravan data sheet describes bonding and sealing in one operation, with noise and vibration damping |
| Non-setting butyl mastic | Bedding windows, vents and fittings | Stays pliable as a vehicle moves. Suppliers describe it as suitable for windows, vents and joints, though movement can squeeze it out of a joint over time |
| Replacement rubber seal | Window and door rubbers that have hardened or shrunk | Replace rather than coat. Match the profile to the original |
| General silicone | Interior or non-structural uses only | Check it is rated for exterior use. Manufacturers specify clean, dry, sound surfaces and removal of old sealant for remedial work |
If a joint is bonded and structural, or you are unsure what the float’s panels are made from, ask the manufacturer which product they approve. Our flooring is backed by a ten-year warranty, and the terms of any warranty are worth reading before you change anything around the floor. Our guides to floor warranty and warranty coverage explain what to look for.
One animal-welfare point: whatever you choose, make sure it is fully cured and non-toxic before a horse is loaded. A plywood repair guide advises that protective sealant should be non-toxic and safe for animals. Check the product’s safety data sheet and observe its cure time and ventilation advice.
What you will need
- Sealant or replacement rubber, matched to the job above.
- A plastic scraper, putty knife or trim tool that will not gouge the paint.
- A spirit-based, oil-free cleaner or panel-wipe, and clean lint-free cloths.
- A polyester scouring pad or fine abrasive paper.
- Masking tape.
- A caulking gun and a smoothing tool (a spatula, or a gloved finger dipped in a product-approved tooling agent).
- Gloves and eye protection.
Step-by-step: how to reseal
1. Pick the day and take the horses out of the picture
Choose a dry, mild day, in shade if possible, and keep the float well away from horses while you work. Solvents, scrapers and open tubes are no combination for a curious animal. If the float has hydraulic parts such as a lifting tailgate or ramp assist, do not work under anything held up only by hydraulics. SafeWork NSW advises that maintenance on hydraulic equipment should, where practicable, be done by someone competent in hydraulic systems and that hydraulics should not be relied on to hold components safely in position. Use proper supports, or leave that part to a professional.
2. Remove the old sealant
Partial removal is the most common reason a reseal fails. Fresh sealant bonds poorly to old, tired sealant. Sealant makers say that remedial work calls for removal of all existing sealant, not a top-up over the top.
For a trim strip or fitting, the Sikaflex datasheet’s method is to take out the cover strip and screws, prise off the fitting and scrape old mastic from both the fitting and the body. Then clean the remnants with a white-spirit-based cleaner. Take your time and avoid cutting into the paint or the panel edge. A caravan sealant guide says to remove loose, cracked or contaminated sealant without damaging the surface.
3. Prepare the surface
Surfaces need to be clean, dry and free from oil, grease, loose paint and old sealant. The manufacturer’s data sheet says to use a polyester scouring pad or fine abrasive paper if a key is needed, then degrease and do a final clean with an oil-free spirit-based solvent. Australian sealant guidance adds that metal should be wiped with a non-oily solvent and dried with a clean cloth, and that the surface should be free of dust, oil and rust.
If you find rust, sand it back, treat it and paint it before sealing. Let the surface dry completely, including any water hiding in the seam.
4. Mask, then apply
Run masking tape either side of the joint to keep the finish neat. Cut the nozzle to suit the joint, and lay a continuous bead without stopping and starting. For a seam under a rail or trim, the Sikaflex instructions say to apply the bead, smooth it to a thickness of 1 to 2 mm, use spacers if needed to keep 2 mm under the rail, and screw the rail down lightly until cured. Excess should be removed while it is still wet. Always follow the instructions for the specific product you buy, as thicknesses and cure times differ.
5. Tool and tidy
Smooth the bead while it is still workable, so it presses into the joint and makes full contact with both surfaces. Peel the masking tape back while the sealant is still soft. Wipe smears immediately, as cured polyurethane is very hard to remove.
6. Cure, then test
Give the sealant the full cure time on the packaging before the float meets rain, a hose or the road. Then repeat the hose test from the bottom up, with a helper watching the inside. Check again after the first heavy rain and after the first long trip. If a seam weeps, find out why before adding more sealant on top.
Window rubbers and glazing
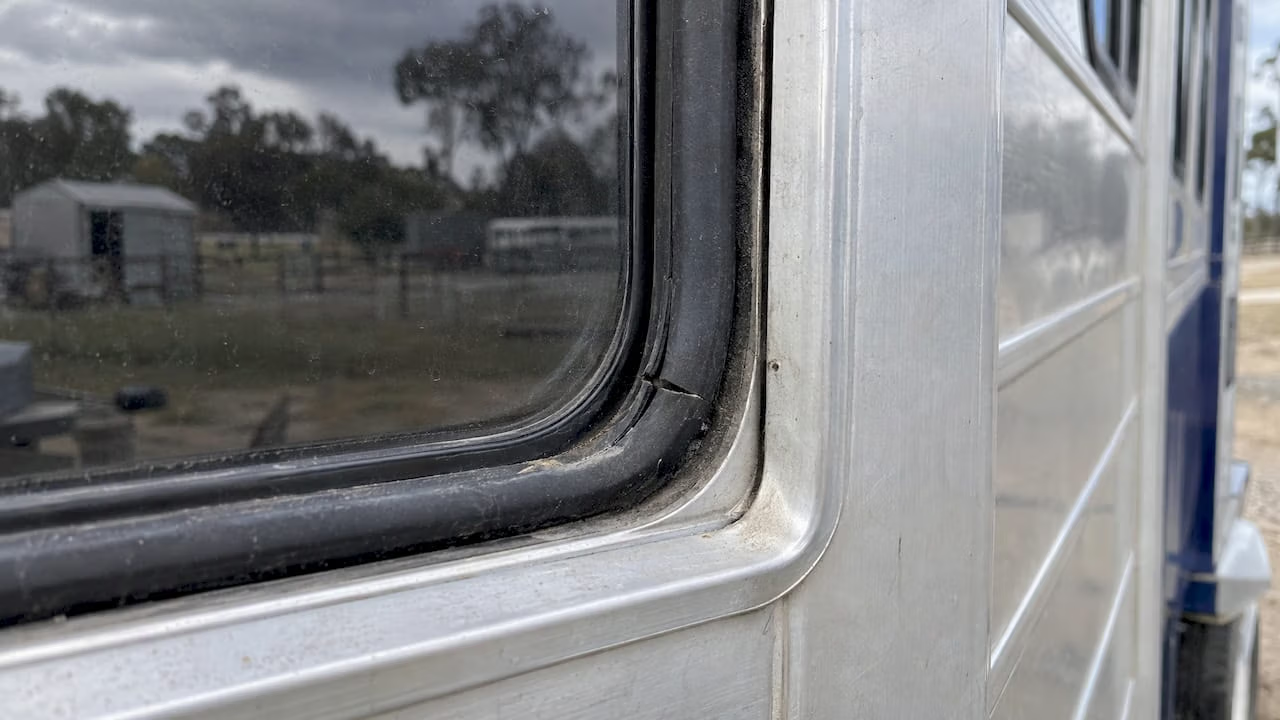
Windows deserve their own note because they are the most frequent culprit. If the rubber has hardened, shrunk or split, replace it rather than coating it. Take a clean sample of the old profile when you order a new one, and note the glass or panel thickness. When refitting, bed the rubber or frame the way the original was done, and clean out debris from the channel before you start. If the frame itself is bent, corroded or loose, see a repairer, because forcing a new rubber onto a distorted frame will not hold.
When to call a professional
Resealing small, accessible joints is a reasonable weekend job. Stop and get advice if:
- The float is under warranty. Caravan makers advise that, with a warranty or a potential leak path, you should contact the manufacturer or a qualified repairer before major DIY resealing and avoid scraping, cutting or resealing structural joints unless directed. The same caution suits a horse float. Our horse float warranty guide covers what owners should know before touching a warrantied area.
- The leak sits over the roof framing, or you cannot find the entry point after careful testing.
- The floor is soft, spongy, bulging or discoloured.
- There is rust through a panel or at a chassis joint.
- The float has been in an accident. Panels and joints can be stressed in ways you cannot see.
- The work involves brakes, hydraulics, drawbar or safety chains.
A good float repairer will inspect the whole float, including tyres, bearings, brakes, the outer body and moving components, not only the seal you came about. That broader check is worth doing at least once a year.
Making it last
- Inspect seals monthly, and after any long haul or heavy storm.
- Hose and sweep out after every use, and remove urine and manure each time.
- Park in shade or under cover where you can. Our article on horse float storage ideas covers options that reduce sun and weather exposure.
- Reseal small problems at once, before water finds the floor.
- Keep a record of what sealant you used, where and when, so the next job is easier and your service history is clear.
If it’s time for a new float
Sometimes the honest answer is that a float has had its day. If you are looking at repeated leaks, a tired floor and rising repair bills, a new float with a well-built floor system may make more sense. We build floats designed for safety, comfort and durability, with European-style design, customisable floor plans and flooring backed by a ten-year warranty. You can browse the Regency Floats range, or look at our 2 horse float range if you are after a compact, easy-towing option.

If you would like help choosing the right float for your horses and your tow vehicle, our team can talk you through the options from our home page.
FAQ
How often should I check my horse float seals?
Check sealed edges and windows at least monthly, and after long trips or severe weather. One Australian maintenance guide recommends monthly checks of sealed floor edges. Small cracks and gaps are cheap to fix early and expensive once water reaches the floor.
Can I use silicone to reseal a horse float?
It is not usually the best choice for exterior vehicle joints. A local caravan guide notes silicone can deteriorate under UV and recommends polyurethane or butyl options that are UV-stabilised. Silicone also leaves residue that complicates future repairs. Check the product’s data sheet for the material you are sealing.
How long should I wait before using the float after resealing?
Wait for the full cure time stated on the product’s data sheet, which varies by product, thickness and temperature. Do not load a horse until the sealant is fully cured and any fumes have cleared. Test with a hose before relying on the repair.
Will resealing fix a soft or rotten floor?
No. Sealant stops water getting in, but it cannot restore damaged timber or panels. If the floor is soft, bulging, cracked or discoloured under the mats, have it assessed and repaired by a professional before sealing anything.
Do I need a professional to reseal my float?
Not for window rubbers or small exposed seams, if you prepare properly. Use a professional for structural joints, roof leaks you cannot trace, floor damage, rust or anything covered by warranty.

